Feeds:
Posts
Comments

Archive for the ‘Main Dishes’ Category

Smoked chicken, caramelized pears and camembert white pizza

Smoked chicken, caramelized pears and camembert white pizza

So whenever I visit the parents for the weekend, my mom always tries to pawn off her groceries on me. Like I’m a just-out-of-the-nest, starving college student or something. Never mind that I’m in my 30’s and fully able to grocery shop for myself. On a recent visit, I arrived back at my condo toting a wedge of Camembert, a bundle of asparagus, shredded Parmesan, mango salsa, and cut-up fruit salad. All courtesy of my mom. Not that I’m complaining, but sometimes I have to come up with ways to use things that I might not otherwise have sitting around. Case in point – the Camembert. I tend towards super-duper aged cheeses myself. Fresh, double cream cheeses are not really my thing.

When in doubt, throw it on a pizza

At least that’s my motto. A google search on camembert told me pears go well – so I figured Camembert, caramelized pears and the smoked chicken from the previous day’s indoor smoking debacle would go nicely. I thought a white sauce would be too heavy, and olive oil alone too boring. So another Google search unearthed a versatile garlic herb pizza sauce that I also used on pasta later in the week. Finally, I threw a little arugula on top – just cause I always wanted to do that.  The result was damn tasty if I do say so myself!

Pizza

Parts:
Pizza crust – my standard Mario Batali
Smoked chicken – maybe 1/4 lb (see Smoked Chicken Indoors for more info. Otherwise, leftover rotisserie or roast chicken would be great)
White pizza sauce (see below – I used maybe half that recipe)
Caramelized pears (see below)
Camembert – maybe like 4 oz sliced thin (this is pizza people – use your best judgement!)
Arugula or some sort of lettuce – a small handful – this goes on AFTER the pizza comes out of the oven

I put it all together and baked at 450 degrees for 13 minutes or so on a pizza stone.  Throw your arugula on top and serve!

White pizza sauce

(really – garlic herb infused oil – great as a pasta sauce too)
From:http://www.recipekitchen.com/Pizza/pizza21.html

Ingredients:
3 T butter
3 T olive oil
1 T white wine
1/2 t rosemary (I used fresh)
1/2 t basil (I used fresh)
1 garlic clove, minced

Steps:
1. Sauté garlic in butter and olive oil.
2. Add all other ingredients and simmer for 15 minutes. Set aside. Can be refrigerated maybe for a week – bring to room temp to use.

Caramelized Pears

Ingredients:
1 pear – cored, seeded and sliced
1 T butter
1 T brown sugar
salt and pepper to taste

Steps:
1. Melt butter in saute or cast iron pan over medium heat.
2. Saute pears for a few minutes on medium heat
3. Add brown sugar and continue sauteeing to caramelize the pears till your desired doneness (I did maybe 10 minutes total).
4. Remove from heat. Salt and pepper (very important! don’t forget the pepper! freshly ground please!) to taste.
Read Full Post »

Smoked Chicken Indoors

Can you smoke meat indoors?

Can you smoke meat indoors?

So the husband was out of town. Usually when he goes away, I go on a massive cooking binge, making all the things I know he hates. Dishes usually involve lots and lots of olives or mac and cheese with all kinds of pungent cheeses. I also make things that I know stink up the house – which are verboten when he’s around. Which is exactly what I did this past week.

We live in the city. For those of you suburban or country folks, I’m sure we can both trade pluses and minuses regarding our living environs. Living in the city certainly means foregoing space, so a large back patio is not in the cards for us. Therefore, we do not have a Big Green Egg or any kind of super cool smoker or grill. Nope. A mini Weber Q is it for us. 

Enter the Indoor Smoker

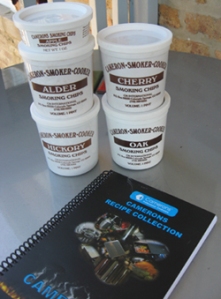
A couple of years ago, I came across the solution to our problems – the Indoor Smoker. I read numerous cooking forum posts on the subject and saw the success others had. I knew I had to have one for myself. It came with a few small tubs of wood chips, but I even ordered extra wood chips – envisioning smoking everything I could get my hands on. I bought Hickory, Oak, Alder and Cherry – not knowing anything about the different flavors or what they were specifically good for. I just knew that smoking food sounded like something I needed to be a part of.


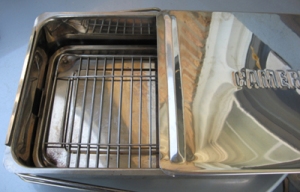
cameronsmoker_open

When the package arrived, I got to work right away. I followed the directions to a T. Put the wood chips in, put the grate on, added the meat, covered the top most of the way, turned the stove burner on, waited for a whisp of smoke, closed the container and hoped for the best. Within 2 minutes, campfire smoked filled the kitchen. I was waiting for the cue from my husband – which came quickly – a glance, an ahem, and an “uh, I think you better turn it off” and my indoor smoking days were abruptly cut short. 

cameronsmoker_woodchips

In the years that followed, I tried it at least one more time. Again. Fail. It just released too much smoke into the tiny condo that has no kitchen ventilation (save for a cross breeze if I open all the windows in the house). I even tried it on the Weber Q – alas, the smoker was just too big for our puny grill. 

cameronsmoker_closed

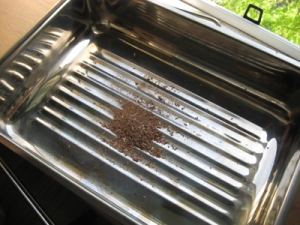
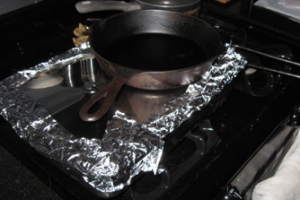
So this past weekend…when the husband was out of town…THIS was my shot.  And this time I was ready. Once again, I put the wood chips in, put the grate on, added the chicken thighs, closed the top entirely this time, covered every opening in a double layer of foil AND placed a cast iron skillet on top for good measure. I fired up the burner and again, within a few minutes, smoke whisped out the sides. I added more foil and at least I couldn’t see any more smoked. But…the smell. 

Well anyway, I figured I could air the place out before he got home. So I let the meat smoke for the full 20 minutes.

The moment of truth

After 20 minutes or so of smoking, I turned off the burner, took the smoker outside for the big unveiling. I pulled the cover off and…totally completely RAW chicken that STANK like cigarrettes. 

Well, that’s just great. Screw this.

Totally dejected and not wanting to risk stinking the house up anymore, I turned on the broiler and shoved the chicken under it for 10 minutes. Totally irriated, I threw it in a tupperware and let my visions of indoor smoking go. 

The next day, I pulled the chicken out of the fridge as I thought maybe I could use it in a salad or on a pizza. Well lo and behold, it actually tasted pretty good! Definitely smoky, but not totally overpowering and horrid like the previous day. 

My verdict?

Ok, next time (and there will be a next time) I think smoking for maybe 5 minutes will do the trick. Then cook like normal cause God knows, it ain’t gonna get cooked in the smoker.

So, uh, are you gonna get one for yourself? 🙂

Read Full Post »

Trust me, this dish is fabulous. I just have really shoddy camera skills. 

Trust me, this dish is fabulous. I just have really shoddy camera skills.

I love reading cookbooks written by chefs. Interesting ingredients and techniques enthrall me. More often than not though, these books aren’t translated for the home cook. Take the Alinea cookbook – I know there is probably just ONE recipe in the entire book I could make at home without expending major effort.  And trust me, it’s not that lavender smoke pillow thingy.

Restaurant recipes dumbed down (well…sorta)

So what’s a home cook to do? I’ve come across a couple of books which help translate restaurant recipes for the home – Chef Interrupted by Melissa Clark and Restaurant Favorites at Home by the Editors at Cook’s Illustrated (aka America’s Test Kitchen, aka ATK). Trust me though, the recipes in each of these books are still quite time consuming – but always worth it. 

Oh yeah, did I ever mention Nuevo Latino cuisine is my absolute favorite? Do we use that term anymore? Latin fusion? Was that totally random and seemingly off-topic? Whatever. Maybe you’ve forgotten the title of this post. I’m just saying I love food with Latin and Caribbean flavors more than just about anything else. Give me a fried plantain any day of the week and I will be one happy girl (I feel a craving coming on!).

One of the most stellar recipes of all-time

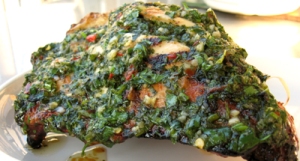
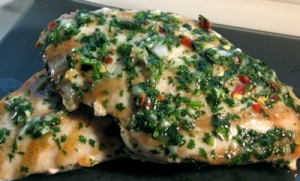
The one recipe that I make over and over again that is based on Latin flavors is the Grilled Lime Chicken out of the Restaurant Favorites book. There are a bunch of accompaniments listed in the book, but I never bother with them any more. It’s the cilantro lime sauce that I covet. It’s a perfect blend of spicy, sweet and tangy. The chicken is bathed in this superb sauce post cooking so it retains all its fresh flavors. It is, without a doubt, the best chicken grilling sauce there is. And it’s the freaking easiest thing you’ll ever make.  Oh yeah, and it makes a fantastic salad dressing too.

So don’t delay. Make this today. Unless…you don’t like cilantro. And if that is the case, I feel for you. I really and truly do.

Still not enticing you? Yeah... I can understand that. Just make the dish already!

Still not enticing you? Yeah... I can understand that. Quit picking apart my crappy photos and just make the dish already!

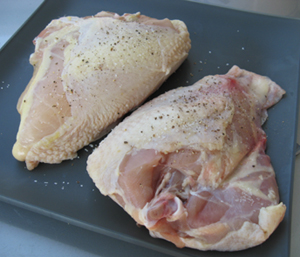
I mean, this is what I had to work with people. Do they even TRAIN butchers anymore?

I mean, this is what I had to work with people. Do they even TRAIN butchers anymore?

Cilantro Lime Chicken

Rewritten from Restaurant Favorites at Home
Makes about a cup of sauce

Ingredients:
1/4 cup sugar
4 chiles de arbol (or 1.5 t red pepper flakes)
3 medium garlic cloves
1 small shallot roughly chopped
1/4 cup lime juice
1 bunch fresh cilantro – leaves and some stems – roughly chopped (about 1.5 cups)
3/4 cup vegetable (or other mild flavored) oil

Whatever the heck you want to grill. The book recommends 6 8-10 oz bone in, skin on chicken breasts.

Steps:
1. This couldn’t be easier – take all the ingredients (minus the thing you are grilling) and stick in mini food processor, blender, whatever. Pulse till combined. OR, if you insist on doing things the hard way, chop them up. Put in a large bowl and set aside. That’s it!

2. Grill your meat (or veg! I suppose you could do that too). If you were going to do bone in skin on chicken, my method in the Pomegranate Chicken recipe works well – basicallly, 10 minutes skin down, 15 minutes skin up. Set aside to rest.

3. Dip your grilled whatever into the big bowl of sauce – make sure it is well coated. Remove and…

4. Serve!

Enjoy!

Ms. Pantry Raid

Read Full Post »

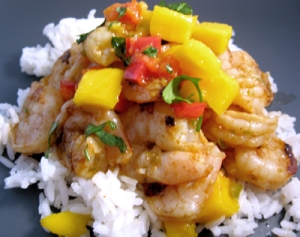
Hot stuff! Shrimp Piri Piri served with diced mango over jasmine rice.

Hot stuff! Shrimp Piri Piri served with diced mango over jasmine rice.

Note to all: No matter how pretty and inviting habaneros look, eating them raw may not be in your best interest. Unless you have a pint of whole milk standing by. AND EVEN THEN. Think twice.

I’m just saying…

I couldn’t help myself. Really, it was calling my name. Teasing me. Whispering “Don’t be such a wuss! Just a little bite! It won’t hurt! I swear I’m not hotter than a jalapeno”. So I popped a hunk into my mouth. Immediately on contact bad, bad things happened. Blisters formed. I swear to god (ok, I’m exaggerating a little). I paced up and down the kitchen repeating the same words over and over “bad. pepper. hot. oh god. bad”. My husband merely laughed at my misfortune. I recall something like “serves you right!” escaping his lips but the memory of the pepper might be playing tricks with my brain.  I finally gave in and took a swig of milk. It cooled the fire in my mouth, but my lips were still ablaze. A good 20 minutes later, the heat finally died down. 

All for the cause my friends, all for the cause.

So yeah. Shrimp Piri Piri is hot stuff.  We are talking numerous habaneros, jalapenos, hot paprika, cayenne all mixed togther and slathered over shrimp. The dish is African and Portuguese in nature, apparently came about during the time of the colonialization of Mozambique.

It is supposed to be served with lemon and butter, but I got the bright idea of serving it with a mango dipping sauce.   Alright, I admit I was scared that the shrimp was going to be so spicy I wouldn’t be able to handle it. Hence why I tried to tame it with the mango. In reality, after grilling, the shrimp wasn’t as hot as I thought it was going to be. Next time, I’ll serve it the traditional way cause I feel like the sweet of the dipping sauce competed with the heat of the shrimp. I might even boil up the marinade and serve that over top too. Just in case I need more heat!

Grilled Shrimp with Piri Piri Sauce

From Some Like It Hot
Serves 4

Ingredients:
2 habanero chiles
7 red jalapenos (I could only find green) or 4 red cherry or cascabel chiles
2 T cayenne pepper
1 T Hot paprika
4 garlic cloves
3/4 cup peanut oil
3 T fresh lemon juice
2 t salt
2 lb shrimp – peeled and deveined (I used medium sized shrimp cause I find them easier to cook – but use at least medium size shrimp since you are grilling them)

To finish the dish, mix together (but don’t do this till you are ready to serve):
6 T unsalted butter, melted
3 T fresh lemon juice

You’ll also need skewers for the shrimp

Steps:

1. Place habaneros, jalapenos, paprika, garlic, peanut oil, lemon juice and salt in blender or small food processor. Process till smooth. 

2. Transfer to a bowl, add in the shrimp and marinate for 4-6 hours.

3. Prepare your grill. Skewer shrimp leaving space between each. Grill shrimp a few minutes on each side to your desired doneness (I err on the undercooked side myself – it will keep cooking after you take it off the grill).

4. Remove from the grill and serve drizzled with the 6 T of unsalted butter and 3 T of lemon juice.

Enjoy!

Ms. Pantry Raid

Read Full Post »

Pomegranate glazed grilled chicken with Middle Eastern nut rice

Pomegranate glazed grilled chicken with Middle Eastern rice with toasted nuts and cinnamon

Let the grilling begin!

I have a bottle of pomegranate molasses in my refrigerator that is a bit past its prime.

Way, way past its prime…

I don’t know why I’ve kept it sitting around for so long – since it adds such an interesting flavor to food. But whatever, it’s been sitting there a long time.

In coming up with a way to use it up, I thought it would go great slathered over grilled chicken. Initially, I had planned on making a thick, sticky, sweet-sour lacquer for crispy chicken skin. A Middle Eastern barbecue sauce, if you will. In the end, I created a lighter, tangy basting sauce. Brushed lightly over grilled chicken, it imparts a fantastically tangy flavor. And neither mouth-puckeringly sour nor cloyingly sweet.

To pair with it…

What would go great with pomegranate glazed chicken? Why rice spiked with toasted nuts and cinnamon of course! A great side dish on its own – the cinnamon really makes it interesting. Sprinkle a little extra over the top when serving just to finish it off. A perfect match!

Pomegranate Glazed Grilled Chicken

Makes 3/4 cup or so of glaze – enough for 2-4 chicken breasts
Ingredients:
1/4 cup white wine
2 T minced shallots
1/2 cup chicken broth
Juice of one orange
1 t honey
2 T pomegranate molasses
1 T butter
2 bone in, skin on, split chicken breasts

Steps:
To make glaze:
1. Combine wine and shallots in small saucepan. Bring to a boil and reduce until wine is mostly evaporated.

2. Add broth, orange juice, pomegranate molasses and honey. Bring to boil and reduce until 3/4 cup liquid is left.

3. Whisk in butter. Season with salt and pepper and set aside.

To make chicken:
1. Start grill. We have a small gas grill that doesn’t have separate burners, so we just light it and let it get to about 450 degrees.

2. Oil grate. Place chicken skin side down on grate. Cover and cook 10 minutes.

3. Flip chicken over. Baste with glaze and cook additional 15 minutes – basting a couple of times..

4. Check temp of chicken. Might need turn it skin side down and cook an additional 3-5 minutes. Might not. Pull off when it is done to your degree of doneness (remember, it will raise maybe 10 degrees after you take it off the grill and let it rest. Give it one more coat of glaze before serving.

Middle Eastern Nut Rice with Cinnamon

Serves 4
Ingredients:
1 T oil
1 small onion minced
1 1/2 cups basmati rice
2 cups chicken stock
1 cinnamon stick
1/2 cup chopped nuts (I used a mix of pistachio and macadamia – cause I had them sitting around)
ground cinnamon

Steps:
1. Toast nuts: place nuts on a baking sheet and toast at 400 degrees for 7 minutes or until fragrant (don’t let them burn). Take out and remove from baking sheet to stop them from cooking. Set aside.

2. In medium saucepan with a tight fitting lid, saute onions in oil over medium heat until soft – five minutes.

3. Add rice. Stir to coat in oil.

4. Add chicken broth and cinnamon stick and bring to a boil.

5. Put lid on saucepan. Turn heat down to low and let cook for 20 minutes.

6. Check for doneness. If done remove from heat, remove cinnamon stick and stir in toasted nuts. Season with salt and pepper. Serve immediately sprinkled with dash of ground cinnamon.

Enjoy!

Ms. Pantry Raid

Read Full Post »

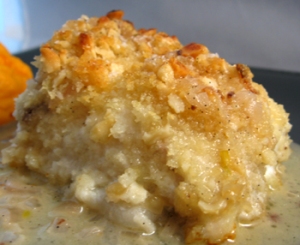
Macadamia Nut Crusted Halibut with Vanilla Bean Butter Sauce

Macadamia Nut Crusted Halibut with Vanilla Bean Butter Sauce

My previous post about the fantastically rich and creamy Vanilla Mashed Sweet Potatoes could only be made more decadent by being paired with Macadamia Nut Crusted Halibut with Vanilla Bean Butter Sauce.

But sadly, we have to start here:

How to reduce that fishy smell?

Answer: you shouldn’t have to (but you can give it a soak in milk for a half hour or so if you really want to get rid of any fishy taste – this won’t work with fish that is already going bad though. Trust me, I tried it).

So I picked up a piece of halibut at Whole Foods. On a Sunday. Big mistake. So when was the delivery?  How long has this fish been sitting out? God only knows, but I knew in my mind I shouldn’t have risked buying that fish. However, Sundays are my big cooking days and I had no choice. The halibut looked the best of the bunch (ok, the Chilean Sea Bass looked best but I thought we weren’t supposed to be eating that??). I got the fish home, unwrapped the package and took a whif. Oy… Ammonia. Should I have taken it back? Probably. Especially considering how much I spent on it (A LOT!). It wasn’t REALLY bad, but it wasn’t good either.

NOTE TO ALL: And this is something I will do from now on, no matter what – ask to smell the fish before they wrap it up. If they give you any hassle, eff them. Then they obviously aren’t selling fresh fish. I spent $18 on a piece of bad fish (that I, um, ate anyway and lived to tell about it. Oh my poor dear husband will freak out when he reads this)!

Gosh, I am drifting off topic, aren’t I? This was supposed to be a happy post about one of my favorite dishes.

Ok, back to fun things! The lovely vanilla infused butter sauce. On Sunday it was drizzled over halibut. Later in the week I tossed it with grilled shrimp. Smashing either way!

Vanilla Bean Butter Sauce

From vanilla.com

Ingredients:
2 shallots, minced
1 Tahitian vanilla bean, split lengthwise
2 cups dry white wine
1 teaspoon white wine vinegar
2 tablespoons heavy cream
4 ounces cold butter (8 tablespoons, or 1 cube)
salt and pepper to taste

Steps:
1. Place the shallots in a saucepan with the vanilla bean, wine and vinegar. Bring to a boil and reduce mixture until 1/4 cup of liquid is left.

2. Add heavy cream and bring mixture back to a boil.

3. Add the butter, cut into pieces, and mix with a whisk until mixture thickens. Remove from heat.

4. Remove vanilla bean and scrape the seeds into the mixture. Add salt and pepper to taste. Keep warm till ready to use. NOTE: If you need to reheat, do so gently as it can separate.

Macadamia Nut Crusted Fish

Ingredients:
1 10 oz fish fillet (an ocean white fish works well – I used Halibut)
1/3 cup panko
1/4 cup chopped macadamia nuts (or other nuts)
pinch of salt
pepper to taste
4 tablespoons (1/2 stick) unsalted butter, melted

Steps:

1. Preheat oven to 350°F.

2. Combine panko, macadamia nuts and salt  in small bowl. Mix in 2 tablespoons butter. Season with a few grinds of pepper.

3. Pour remaining 2 tablespoons butter into shallow baking dish. Place fish in baking dish, turning to coat with butter.

4. Spoon panko mixture atop fish, dividing evenly. Press topping gently to adhere.

5. Bake until fish is cooked through, about 20 minutes or so (depending on thickness of fish). Pop under the broiler for an additional minute or two to brown the topping.  Transfer to plates and serve.

I served atop a ladle of the Vanilla Bean Butter Sauce and accompanied by a side of Vanilla Mashed Sweet Potatoes.

Enjoy!

Ms. Pantry Raid

Read Full Post »

Sour cream adds a little tang to this grilled cheese.

Sour cream adds a little tang to this grilled cheese.

It’s National Grilled Cheese Month!

Now, THAT is a cause worth celebrating, no? In homage to this festive gala of cheese, I had planned on making a ton of different sandwiches and posting my favs. But lo-and-behold, a blogging event at Panini Happy was egging me on. No time to debate which cheese has the best tang to meltability (it’s a word) ratio. Time to get cooking!

Sour cream in grilled cheese?

I recently read something that cookbook author extraordinaire,  Donna Hay, had developed a grilled cheese recipe which involved mixing cheese with sour cream. I thought that might work really well for cheeses that aren’t great melters – plus give it an added tang. And since I have a penchant for aged cheese (a 12 month Manchego in this case), I thought this might be a good idea for me.

A little sweetness

Next up – I like grilled cheese with a touch of something sweet. A thin layer of chutney, hot pepper jelly, or maybe a little fig jam might be nice. In my fridge is a container of dates just hanging out – all bored and neglected. I thought maybe pureeing them with a little pomegranate molasses might make a nice spread.

And meat

Finally, who doesn’t love a little cured ham? Serrano would have been my first choice given the Manchego cheese and date combo, but my grocery didn’t have it. So prosciutto it is!

Put the whole thing on some country bread, fire up the cast iron skillet, add a ton of butter and a fabulous sandwich is only minutes away.

Date, Manchego and Prosciutto Grilled Cheese

Makes 2 sandwiches

Ingredients:
4 oz grated Aged Manchego cheese
1 T sour cream
pinch salt
4 slices Country bread
4 slices Prosciutto or other cured ham (cough Serrano…Jamon Iberico…cough)
1-2 T buttter for skillet

For Date Spread:
1/4 cup dried, pitted dates
1/4 cup boiling water
1 t pomegranate molasses

Steps:

1. Make the date spread: soak the dates in the boiling water for 5 minutes. Add the pomegranate molasses. Puree in blender/food processor. Set aside.

2. Combine grated Manchego with sour cream and pinch of salt. Set aside.

3. Take 2 slices bread. Spread date spread on one side of one piece of bread. 

4. Layer one slice prosciutto on each slice of bread.

5. Place half of the cheese mixture on one slice of bread. Spread to edges.

6. Place other slice of bread with prosciutto on top.

7. Heat cast iron skillet over medium for a few minutes. Add half of the butter. Swirl to coat the pan. Place sandwich in pan and grill on both sides till as golden brown as you like it (some of us like things more burnt than others!).

8. Repeat steps 3-7 for second sandwich

Enjoy!

Ms. Pantry Raid

Read Full Post »

The best France has to offer!      

French influenced pizza

Vacation memories

Back when the economy was booming (well, right about the time it started to crash and burn), we took our honeymoon to Tahiti. All the stars were aligned in the sky – which is the only way we were ever able to afford it (in reality, it was Chase Bank -known to me forever by another, more colorful moniker –  messing up our property tax escrow for a full year and supplying us with a hefty refund when they finally got it right). The French influence abounds in the local cuisine. Of course, fresh fruit and Tahitian vanilla were everywhere. But so were Croque Monsieur and Crepes.

Our first night, we walked to a nearby restaurant on Moorea called Le Sud. My husband had a chicken curry and I had a personal pizza. Cracker-thin crust was layered with creme fraiche, thinly sliced potatoes, herbs, olives, caramelized onions, and topped with gruyere. Hot and bubbling and intensely flavorful, it was my new favorite food. I’ve been trying to recreate it ever since.  How could something so simple be so hard to produce? Perhaps it was the romance of the islands that had me under its spell.

Where to start?

Suzanne Goin has a wonderful recipe for a Wild Mushroom Tart with Onions and Gruyere in her Sunday Suppers book that seemed like a good jumping off point. From that recipe, I came to understand that her influence was the Alsatian pizza, Flammekueche. The base is puff pastry layered with creme fraiche and gruyere. What could be more French than that? While a little different than the pizza from my memories, it was pretty close.

Mexican Crema  =/= Creme Fraiche

Cause I’m cheap, I thought I could use Mexican crema in place of the creme fraiche. It worked out ok in a pinch, but I wouldn’t recommend it cause it curdles pretty easily. In the recipe below, I replaced the crema with the creme fraiche.

Don’t forget to caramelize the onions!

The recipe also requires caramelized onions. Easy to make, just takes awhile. The longer you let them cook the better they are. I lightly sauteed onions in a combination of butter and olive oil. Then I reduced the heat and let them cook down for maybe 10-15 minutes. Finally, I popped them in the oven while I was cooking something else and let them go for another 45 minutes.  

Alsatian Pizza

Serves 2 for dinner, more as an appetizer

Ingrediants

1 sheet puff pastry – thawed
1/4 cup creme fraiche
1/4 cup caramelized onions
2 pieces bacon – crumbled
sprinkle of fresh thyme
handful of olives, pitted and chopped
1/2 cup grated gruyere

Steps

1. Preheat oven 400 degrees F.

2. Unfold puff pastry. Score the edge with a knife – so, about 1/4 inch from the edge, run your knife parallel to the edge all the way around all four sides of the sheet of puff pastry. This will make the edge rise up nicely.

3. You could brush the edges with an egg wash, but I didn’t…

4. Spread the creme fraiche evenly along the surface – up to the scored edge.

5. Sprinkle caramelized onions, thyme, bacon, and olives across the creme fraiche.

6. Sprinkle the gruyere on top of the other toppings

7. Bake in 400 degree oven for 20-25 minutes or until the top is golden brown. Cut into pieces and serve.

Enjoy!

Ms. Pantry Raid

Read Full Post »

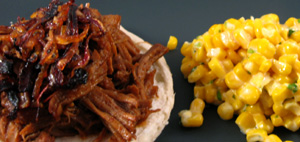
Yes, I counted the whole bun in my costs. Topless sandwich is for pix sake only!

Yes, I counted the whole bun in my costs. Topless sandwich is for pix sake only!

Hobo Mondays

Thursdaynightsmackdown has a new once a month blogging event called Hobo Mondays: come up with a meal to feed 2 for under $5. Well, we are looking for ways to cut down our grocery bill over here at Pantry Raid, so I thought this was prime opportunity to get off my butt and actually DO something about it. 

As far as groceries go, I certainly have gotten better about using things up. We don’t have nearly the amount of food molding away in the back of our refrigerator that we used to. But I still don’t really do well on the low-cost meal front. I go to the store, I get excited, $16/lb imported Spanish chorizo gets purchased, you know the story. So anyway, here goes nothing!

I had a plan of what I wanted to make for my first Hobo Monday. But I got sucked into making something totally different cause pork country ribs were on sale this week. Count me IN. Menu be damned!

Coke Trafficking

So ok, now what? Pulled pork sandwiches sounds good. I’ve wanted to do rootbeer pulled pork forever. Then I  thought Coke pulled pork might be good too. AND since I live up the street from a Mexican market, I thought I could be super slick by using a can of Coke made with PURE sugar vs high fructose corn syrup. Somehow, Mexico gets the good stuff and in the States, we get HFCS. So I marched down to the store, grabbed the cool, retro, “Imported from Mexico” bottle, and headed to the checkout. Just to be sure, I checked the ingrediant list. HFCS! Dang it. Thwarted. Do tell why one would import Coke all the way from Mexico AND not have it be the kind with real sugar? Hmmm??? What’s the point? I plan on boycotting my little corner market in silent protest. Ok, I probably won’t, but right now I’m mad.

Mexican Street Corn (well, kinda sorta…)

Alright, pulled pork sandwiches. What goes with it? Corn sounds good. But plain corn is blah, so add some cheese, a little lime, maybe some cilantro and now we’re talkin’. We’ve got a great summertime meal. Never mind that it’s flipping April and it’s SNOWING outside. AGH!

How did I do?

Total meal cost? About $5 give or take. Here’s the breakdown:

$1.32 for pork (assuming 6 oz pp).
$0.94 2 rolls
$0.50 can of coke
$1.10 can of corn
$0.05 for half a lime (Mexican markets are CHEAP)
$0.05 sprinkle of cilantro (see above)
$1.00 worth of parmesan
a whole mess of pantry spices and a little bit of mayo

So $4.96. Just under the cutoff!

Coke Pulled Pork

Stolen verbatim from Chu This so just go there and, uh, follow the directions. The only changes I would make are to reduce the chicken stock to 1 cup (maybe less), add a little more sugar, and you really only need to reduce like a cup of the resulting liquid (otherwise you’ll be reducing the sauce for days).

Oh yeah – and those crispy things in the picture? Those are fried onions and they don’t count cause they were sitting, rotting away in my fridge from last week’s Pork Curry. Hey, just being frugal over here!

Parmesan Lime Corn

This is kind of a bastardized version of Elote – Mexican Street Corn. Usually served on the cob slathered with a mixture of cotija cheese, mayo, lime juice and cayenne pepper, I’ve chosen to make it off the cob and with parmesan instead of cotija cause, shoot, that’s what I had in my fridge. Oh, and I forgot the cayenne pepper. I sure am forgetful lately! 

Ingrediants:

11 oz can corn
2 T grated parmesan
1 T mayo
1 T cilantro
juice of half lime
salt to taste

Steps:

1. Heat corn in small saucepan. 

2. Remove from heat and add in mayo and parmesan. Stir till thoroughly combined.

3. Add lime juice, cilantro and salt to taste. Stir to combine and serve immediately.


Enjoy!

Ms. Pantry Raid

Read Full Post »

Burmese Pork Curry

Burmese Pork Curry: very flavorful with tamarind, hot peppers and turmeric.

Another round of What I’m Reading Now: Cuisines of the Axis of Evil and Other Irritating States – A Dinner Party

So I came across this book awhile back that combines foreign policy AND food. Interesting concept, I thought. Admitted, I find foreign affairs intriguing, but food is my first love and takes up most of my free reading time. Alas, I am rather uninformed on global goings-on. This book manages to combine the two topics into an extraordinarily interesting book.  

Mission of Burma

The author takes us to what she considers the “Axis of Evil” – North Korea, Iran, Iraq, Israel, India, Pakistan, Cuba, Burma, China, and “the Great Satan” USA (if you thought this book wouldn’t be left-leaning, you are sorely mistaken) discussing who has nuclear weapons, who wants them and who is the biggest threat regarding worldwide peace. Then she shares the food and culinary history of the region.

The great U.S. of A. gets Beer Butt Chicken. What could be more All-American than sticking a beer can up a chicken’s butt? As much as I’d like to give it a try, I opted to make something a little different and headed to the chapter on Burma which, if you read this book, you probably won’t call Myanmar ever again.

Wata Majeedi

I chose the Burmese pork curry mostly cause I have a package of tamarind paste that’s been sitting in my cupboard for months now, begging to be opened.  The curry was super flavorful and really easy.  The only real changes I made were to reserve the marinade and then throw it in to the pot towards the end of cooking – just to add more flavor and make more of a sauce.  

You are supposed to serve the curry with a garnish of fried, crispy onions. But I FORGOT. Meaning, I went through all the trouble of making the stupid onions but when the time came, I was so hungry I completely forgot I had set them aside. Of course as I dished up the curry, I thought to myself, “this could use something crunchy”. Um, yeah…like crispy, fried onions perhaps?? Alas, I threw some slivered almonds over top and called it day. Worked well, but when I found the onions during kitchen cleanup, I was MOST displeased!

Wata Majeedi (Pork Curry with Tamarind)

Adapted from Cuisines of the Axis of Evil and Other Irritating States: A Dinner Party

Ingredients:

1/2 cup tamarind water (requires soaking tamarind paste in water – see steps below)

2 t fish sauce

1 inch piece of ginger – grated

5 cloves garlic – crushed

1 medium yellow onion – chopped

1-3 serrano chiles or small, Asian chiles

1 t turmeric

2 t paprika

1/2 t salt

1 lb pork loin or shoulder – chopped into 3/4 inch cubes

3 T onion oil (see fried, crispy onions garnish recipe below) – or 2 T canola and 1 T sesame oil

2 1/2 cups water

For garnish – chopped cilantro, fried onions (see recipe below). I added chopped almonds for crunch.

Steps:

1. Make tamarind water – soak 2 inch cube of tamarind paste in 1/2 cup warm water for 30 minutes. Remove tamarind pulp – squeezing as much water as you can out of it. Discard tamarind pulp.

2. Puree the fish sauce, ginger, garlic, onion and chiles in a blender or small food processor (alternatively – just chop them fine).

3. Make the marinade – in a bowl (or whatever dish you want to marinade the meat in), mix the puree made in step 2 with the tamarind water, turmeric, paprika, and salt. Add the meat and marinade overnight (or on the counter for 15 minutes. But overnight is better).

4. Heat the oil in a heavy pot. Remove the meat from the marinade. Add the meat to the pot and brown on all sides. Reserve leftover marinade.

5. Add the 2 1/2 cups water to the pot and bring to a simmer. Cover, lower the heat and continue to simmer for 30 minutes. Check the meat and add another 1/2 cup water if it is dry. Continue to simmer partially covered (may need to increase heat) for another 20 – 30 minutes. You want the liquid to reduce quite a bit, but don’t want the meat to scorch the pan.

6. Stir in the reserved marinade to the pot and bring to a simmer. Check the meat to see if it is tender. When tender, serve.

I served the meat over basmati rice with chopped cilantro and slivered almonds. I was SUPPOSED to serve with fried onions (recipe below), but as I said earlier, I am dumb and FORGOT!!!

Fried, Crispy Onions and Onion Oil

Ingredients

3 medium yellow onions

1 1/2 cups peanut oil

1 t turmeric

Steps

1. Slice the onion into very thin strips.

2. Heat the oil in a medium skillet over medium high heat

3. When the oil is hot, fry the onions. You may need to do this in batches depending on the size of your skillet. Stir from time to time to prevent burning.

4. Let the onions brown evenly. When they are a nice dark golden brown (not burnt!), remove from the oil using a slotted spoon. 

5. Place onions on folded up paper towls to absorb the excess oil. Onions can be stored in the fridge for a week or two to use as a condiment. Reserve the oil to use in the pork curry or wherever you would want to use onion oil.

 
Enjoy!

Ms. Pantry Raid

Read Full Post »

« Newer Posts - Older Posts »